On our never-ending journey to find a good solution for ultralight rain gear, we have now made simple rain kilts (rain skirts) from DCF (Dyneema® composite fabric).
Quick Facts
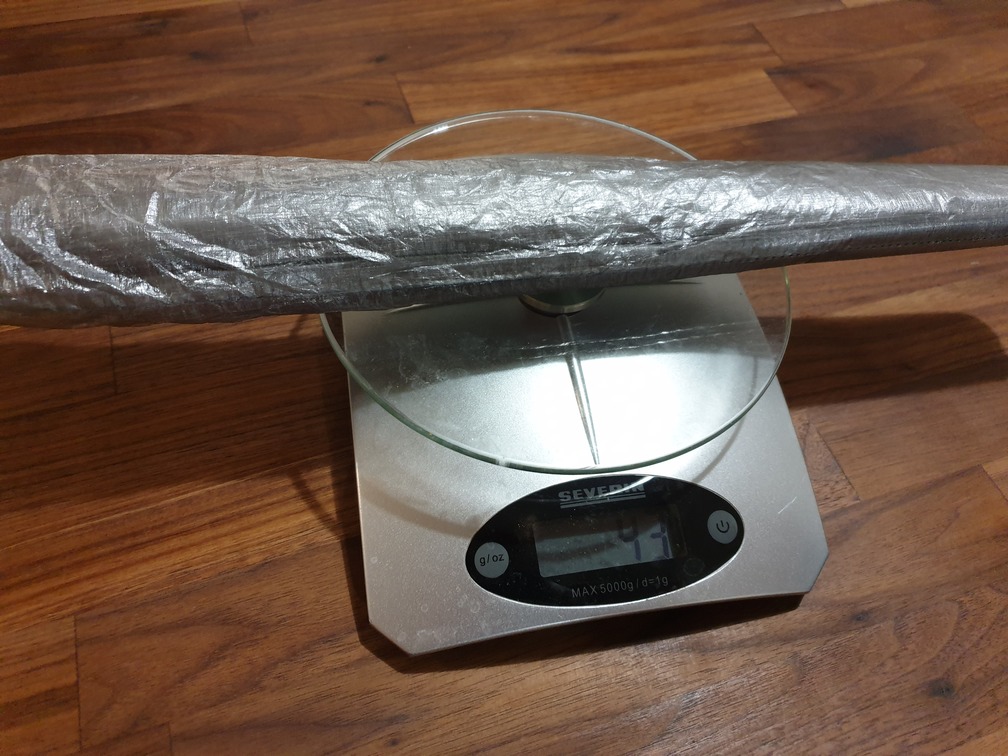
- Weight: 21 grams
- Cost: 25€
- Difficulty: Beginner
- Time: 1 hour


Planning and Construction
We chose a very simple design for the kilts–similar to wrap-around skirts, fixed simply with Velcro. We also considered a zipper version (similar to the Z-Packs rain kilt) but decided against it for several reasons:
- The zipper is very heavy compared to all the rest of the material.
- The zipper is a weak spot that might leak water.
- To keep flexibility with the zipper, additional features would be required.
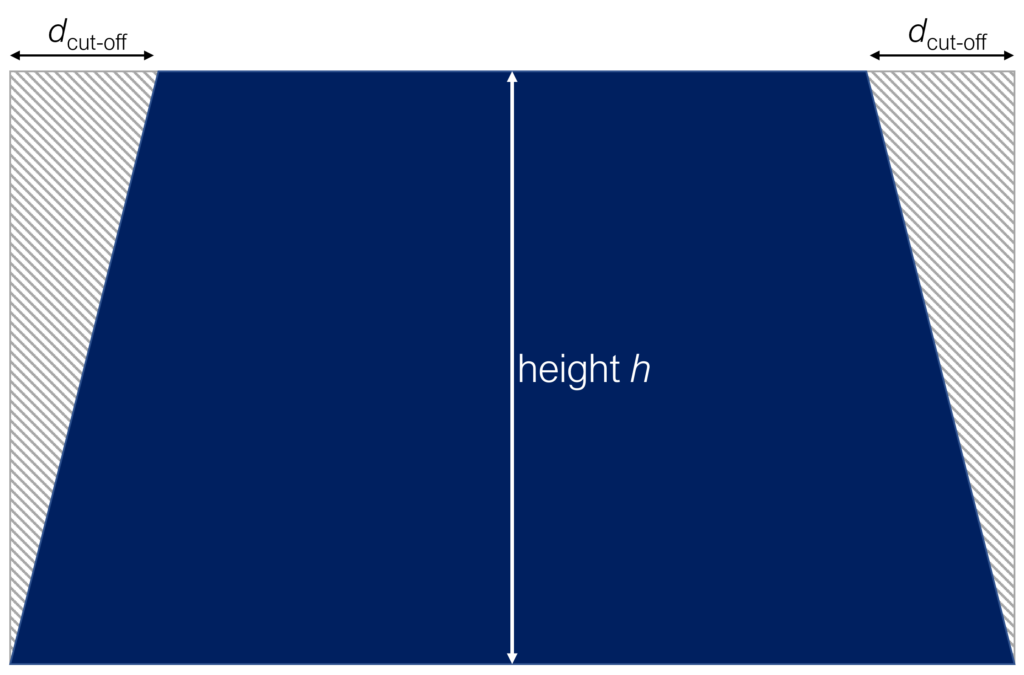
Geometry
Materials
- 80-100cm DCF (width: 140cm, 18 g/m2)
- Velcro (width: 20mm): 8cm hooks + 16cm loops (if possible, get the adhesive kind to help positioning)
- Yarn
Necessary tools
For this project, only a sewing machine with a normal foot, good fabric scissors, a tape measure are necessary.
Step-by-Step instructions
Step 1: Cutting and folding the fabric
1. To determine the length of the top side and the height h of the trapezoid shape, we wrapped the fabric around the hips and measured how much it overlapped. As we wanted ~20cm overlap, we calculated:
dcut-off = (measured overlap (in cm) – 20cm) / 2
To get the height h of the trapezoid, we measured the length from the top to approximately half the calves (during walking the kilt moves up a bit by itself, so we did not want it too short). Add 3cm to that length to account for the folded top edge later.
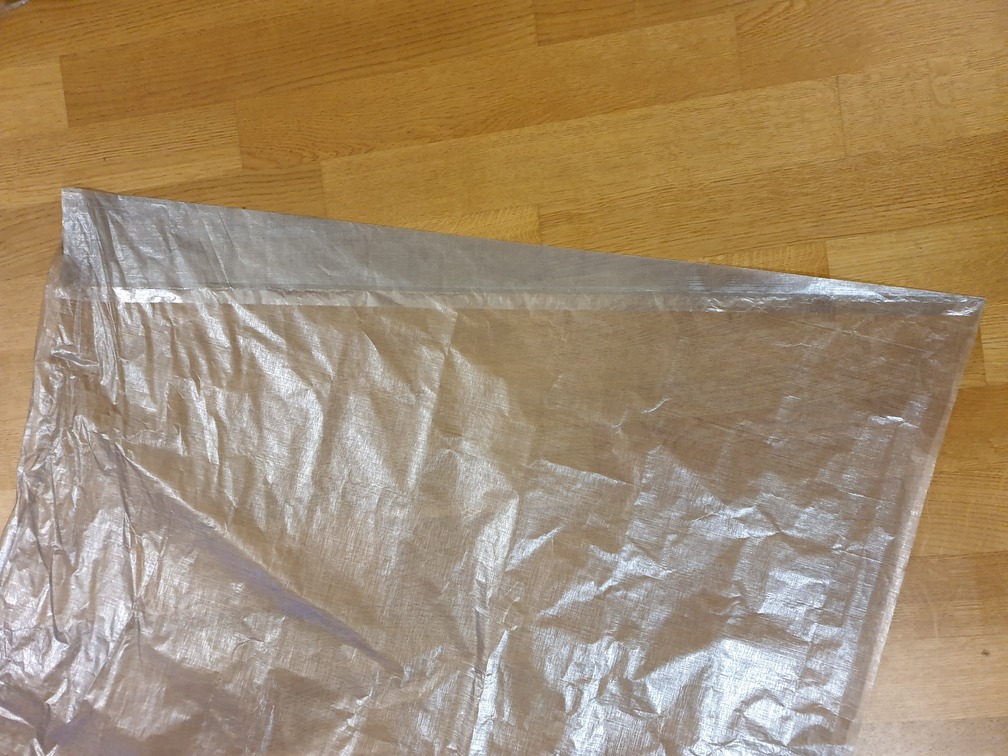
2. DCF can be folded like paper to get the lines for cutting. We therefore used the measurements from step 1 to first fold and then cut the fabric.
3. At this point we were not sure whether we would want a cord in the top edge to pull it tight around the hips, so we just prepared a tube for a potential cord, with the additional benefit that the Velcro was sewed onto multiple layers of fabric, not just one.
To that end, we folded the top edge first 5mm, and then again 2-2.5cm.
Step 2: Attaching Velcro and sewing top edge
1. We attached the adhesive Velcro hooks to the very end of the top edge (on the side where the fabric was folded over).

2. To achieve a bit of flexibility with the circumference of the kilt, we made the loopy side of the Velcro twice the length of the hooks.
We wrapped the kilt around the hips and marked with a pen where the Velcro hooks ended up.
3. We then added another 4cm from the marking and attached the Velcro loops to the fabric (Important: The Velcro loops go on the other side of the fabric than the hooks!)
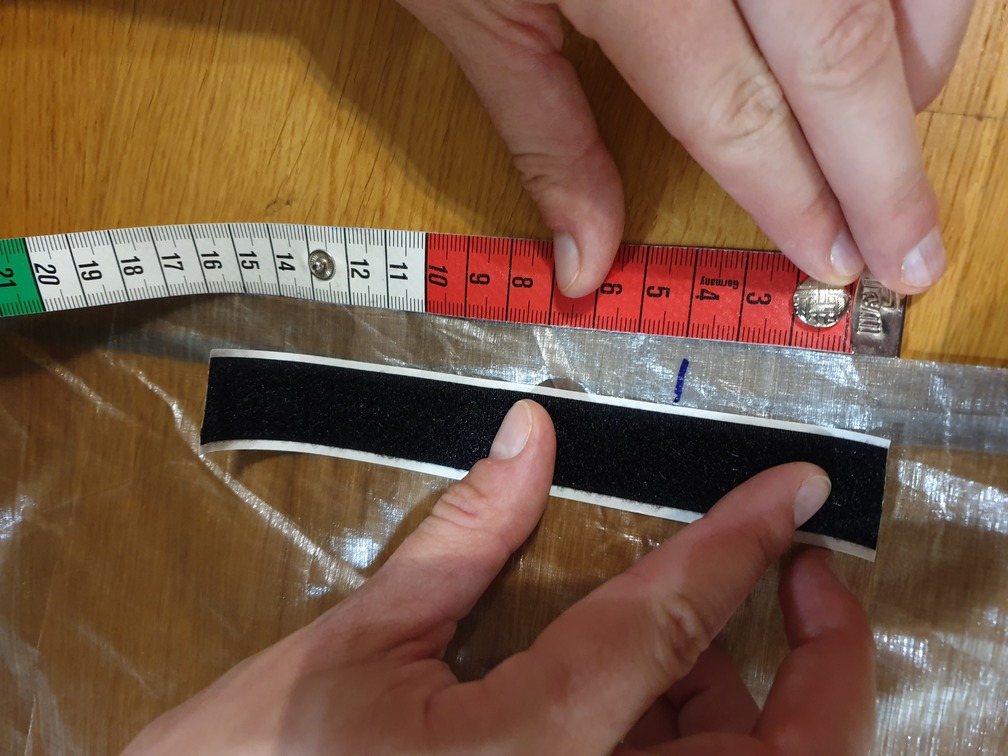
4. Finally we sewed the Velcro to the fabric and closed the lower edge of the folded tube: We made one stitch line on the entire lower edge of the tube and two more stitch lines only on the top edges of the Velcros.
It is important not to sew on the side edges of the Velcro, otherwise the tube is sewn shut.
FINISHED!
Conclusion
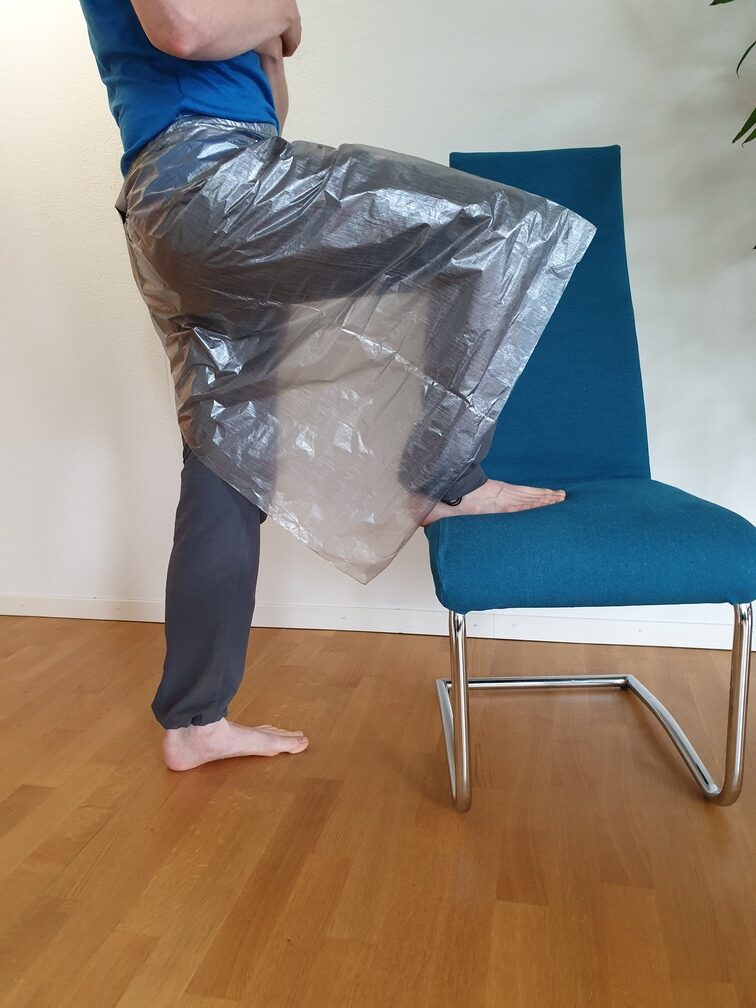
- To put on the kilt, just wrap it around the hips and close the Velcro in the front. Then turn the Velcro to the back to have the opening of the fabric also in the back.
- DCF is very easy to cut and sew! Another advantage compared to other fabrics is that the edges do not have to be sewn over, because the edges do not fray.
- Without backpacks with hip belts, the kilt moves up by itself and does not stay in place. With backpack, however, there is no problem as the kilt is kept in place by the hip belt.
- From the scraps we cut off to make the trapezoids, we sewed a pouch for our two kilts. Total weight: 43g!